Cauliflower, Potato and Tomato Curry

An Indian wedding goes many many days long. The typical Indian wedding is approximately 3 to 5 days long. Can you imagine planning all different breakfast, lunch and dinners for hundreds of guest for all those days? Especially when the bride’s family loves food and looks for the innovation and the groom’s family is in the restaurant business? That is what happened in our situation. Menu planning was a feat for my family and we wanted to make sure we had unique dishes that were not the standard fare and therefore will be remembered by our guest. For me, it was important to surprise my soon to be hubster with some of his favorite dishes all throughout the event. Everyone loved it! Till this day, we get complimented on the feast we had catered. (Special thanks to Rasoi and Palace of Asia and my cousins for making this happen!) For our wedding day lunch, I had Palace of Asia create a punjabi spiced version of the dish that I am about to share with you – Cauliflower, Potato and Tomato Curry. The hubster loves this dish! My mummy would make it for him all the time when we dated and once we married, I learned to make it for him. It’s hearty, simple, fast to throw together and requires very few ingredients.

The main veggies in this dish are cauliflower, tomatoes and potatoes.

20140210-230012.jpg

The spices are very basic as well – just salt, red chilli powder turmeric and a pinch of garam masala. It’s perfect for a cold winter night.

Cauliflower, Potato and Tomato Curry (serves 4-5)

1 large potato – chopped in 1/2″ cubes
1/2 head of cauliflower chopped in small pieces (approximately 2 1/2 cups)
2 1/2 plum tomatoes – chopped in medium pieces
1 1/2 tbsp. oil
1/2 tsp. mustard seeds (rai)
1/2 tsp. cumin seeds (jeeru)
1/2 to 3/4 tsp. red chilli powder (I used 3/4 tsp. since we like ours a little spicer)
1/4 tsp. turmeric powder (haldi)
1 1/2 to 2 cups of water
Salt to taste
1-2 tbsp. chopped cilantro (optional)

1) Heat oil in a kadai/skillet/sauté pan on medium high heat.

20140210-230928.jpg
2) After 1-2 minutes (once oil is heated) add mustard seeds and cumin seeds and wait for them to sputter.

20140210-231057.jpg
3) Add chopped potato, turmeric powder and red chilli powder and mix.

20140210-231201.jpg

20140210-231410.jpg
4) Lower heat, add 1/2 cup of water and cover pan/wok. Place heat back on medium high and let potatoes cook for 3-4 minutes.

20140210-231713.jpg
5) Add cauliflower and mix. If water has evaporated, add another 1/2 cup.

20140210-231849.jpg

20140210-231902.jpg
6) Cover and cook on medium high heat for approximately 5 minutes until cauliflower are slightly tender.

7) Add chopped tomatoes and an additional 1/2 to 1 cup water if needed. (We like ours with more gravy so we added 1 cup).

20140210-232220.jpg
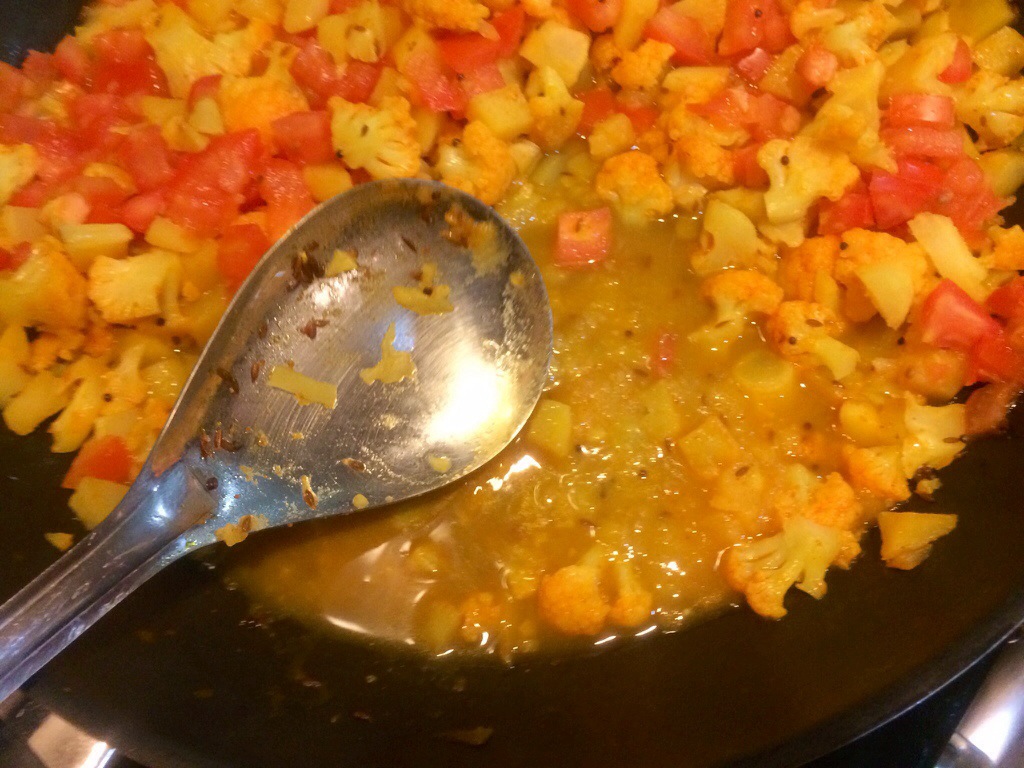
8) At this point, my mother recommends squishing some of the potato pieces with the back of your spatula/serving spoon to help create a thicker gravy. It really works! After all, mummy knows best!

20140210-232342.jpg
9) Add garam masala and mix. Cover and cook for another 2-3 minutes until the tomatoes soften up and some of the water thickens to a gravy.

20140210-232736.jpg

20140210-232831.jpg
10) And voila! It’s ready to serve. Garnish with fresh cilantro and serve with roti/paratha or rice along with your favorite accompaniments. (We used homemade mango pickle, pickled peppers, onions and papadum).

20140210-233038.jpg

20140210-233052.jpg

Hope you enjoy this dish as much as we do! I hope this inspires the hubster to make it for me one day! Keeping fingers crossed!

Spinach and Artichoke Grilled Cheese Sandwich

This year, I made the Hubster make a new year resolution – to start making, packing and taking lunch from home. This is one of the easiest ways to start saving a few dollars every week. And those dollars add up quickly especially if you are buying lunches in the NYC area which can run you 10-15 dollars everyday! Can you imagine all the savings! How is his resolution going – well let’s just say he is taking lunch at least 2-3 times a week – making and packing lunch is a different story. That job is left for his absolutely lovely sweet caring wife – ME! One of our favorite lunches is a grilled cheese sandwich. And it can’t be just any ordinary grilled cheese, it has to be a gourmet grilled cheese. Let’s start with the basics of what I believe are the fundamentals to making a crunchy, perfectly melted, tasty grilled cheese.

1) Bread – this is essential to getting the desired crunchiness! I’m not a fan of pre-packaged breads for grilled cheese. My preference is really good bakery bread that can be found at any supermarket. Crispy, chewy, flaky crust on the outside. Light, fluffy and airy on the inside.

2) Butter – a good spreadable salted butter. (Though I do tend to omit this at times to save a few calories)

3) Cheese – use a good flavored melting cheese. Additionally, I like to shred my own cheese. I think it helps the cheese melt more evenly – not to mention you can cover every inch of the bread with cheese.

4) Fillers – this is where you can get creative! Our favorites are mushrooms, spinach, broccoli, Potbelly’s pepper mix (or giardiniera mix will do as well), olives, pickled jalapeños, onions and tomatoes. Of course we don’t use these all at once! Which leads to my last basic and maybe the most important

5) Proportion! – The perfect bite should have the right amount of bread to cheese to fillers. Over filling the sandwich will make it fall apart. By adding too much cheese you risk losing your flavor profile. By not having enough cheese, you risk calling it grilled cheese.

Most important thing to remember,you have to determine what works for you and your taste! Everything is a matter of opinion.

Next, let’s talk about cooking your grilled cheese – there are many methods from stovetop cooking to oven cooking. My preferred method is using my Cuisinart Griddler only because it’s fast, easy and easy cleanup!

20140208-091319.jpg

Now that we have our basics, let’s build our grilled cheese. For tomorrow’s lunch, I’ve decided to use multigrain bread, fresh mozzarella cheese, parmigiano-reggiano, spinach, artichokes and for my husbands sandwich – onions and Potbelly peppers.

20140208-090734.jpg.

First butter your bread. Then layer it with mozzarella cheese. At this point I add some salt and freshly cracked black black pepper. I always like to add the cheese first because it’s the glue for my bread and fillers.

20140208-095236.jpg
Next, I layer my spinach and artichokes.

20140208-095343.jpg. For the Hubster’s sandwich I add a few sliced onions and the Potbelly’s pepper. I top it off with the parmigiano-reggiano. Normally, I use parmigiano-reggiano to coat the outside of the bread to make a cheesy crust. This time I added it on the inside. (I did also sneak in a few pieces of mozzarella cheese.

20140208-100015.jpg
Last top it off with another slice of buttered. I just close my Griddler and let it cook it for 4-5 minutes on high. Once it’s done, serve immediately or place on a cooling rack if it’s for later.

20140208-100620.jpg

The verdict: The hubster loved loved loved his grilled cheese for lunch. Hopefully, I can motivate him to make it himself next time!